Take an order and send it to the kitchen
Who: server or cashier. When: a table orders food.
Quick version
Sell › Tables › tap the table › tap the items › pick any extras › Send.
1. Pick the table
Go to Sell › Tables and tap the table.

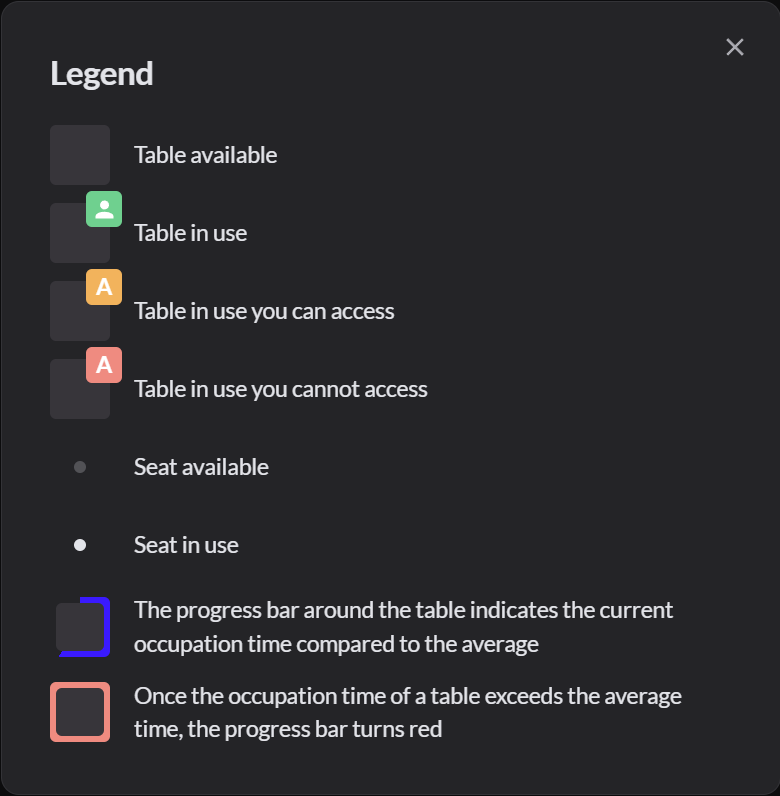
A badge on a table means it has an order. Click Legend at the top right to see what each badge means:
- Green: your table, in use.
- Amber: someone else's table that you can open.
- Red: someone else's table that you can't open. Ask them or a manager to give the order to you.Give an order to another server
For an order with no table: How to start a tab or a counter order
2. Set the number of guests
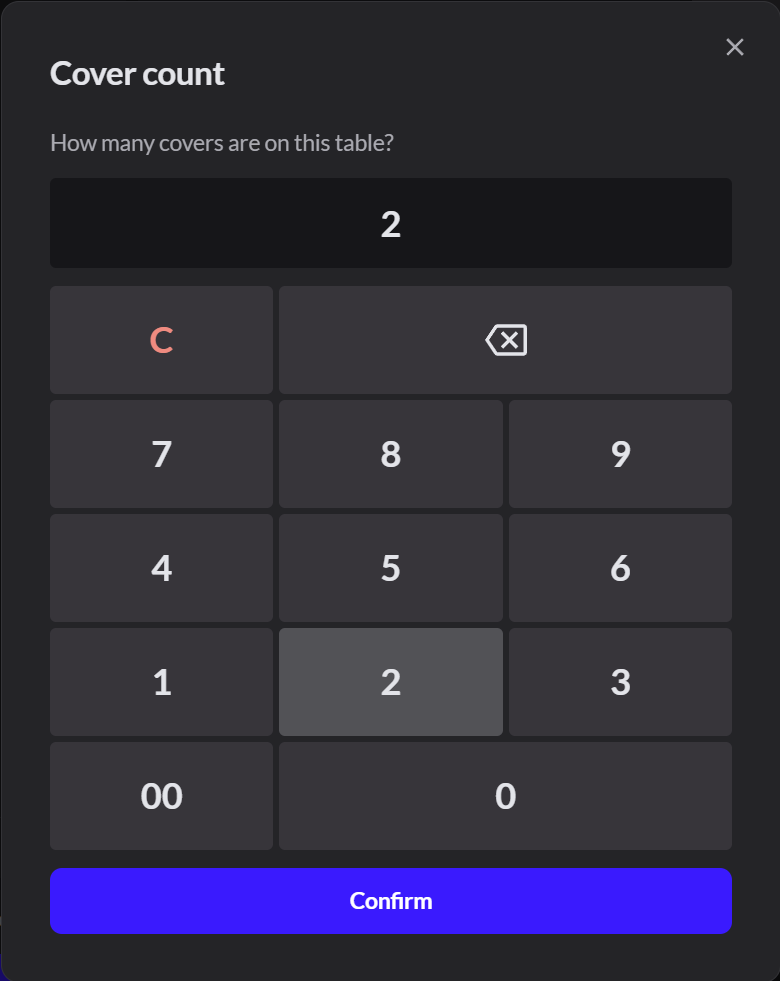
The button with the fork and knife at the top of the order shows the number of covers (guests). Tap it, type the number, and click Confirm.

3. Tap the items
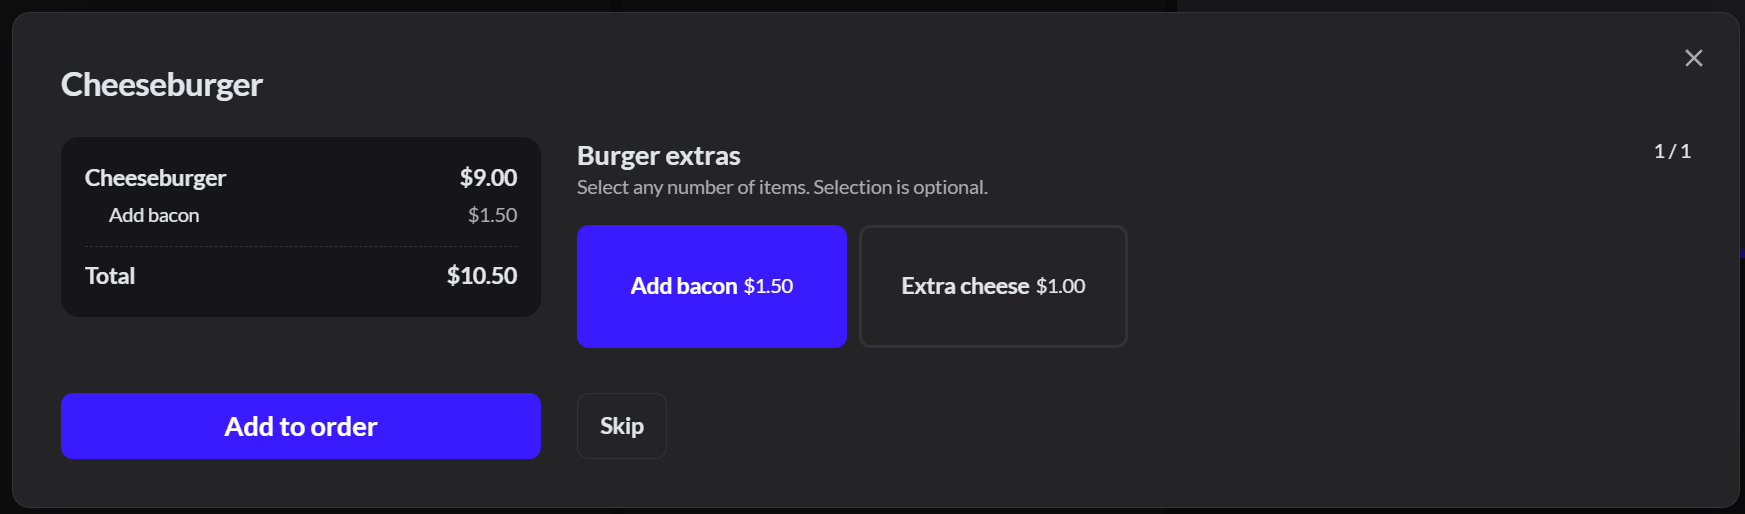
Tap each item on the menu. If an item has extras or choices, a box asks you to choose. Tap the ones you want, then click Next step. On the last step, the button says Add to order.
- The line at the top says what to pick, such as Select 1 item. Selection is required. A required step has no Skip.
- For a combo, such as a burger meal, you pick each part in turn. Extra prices show on the tiles, such as +$1.00.
- To skip optional extras, click Skip.
- If an item has no price, type its price and click Confirm price.
4. Check the order
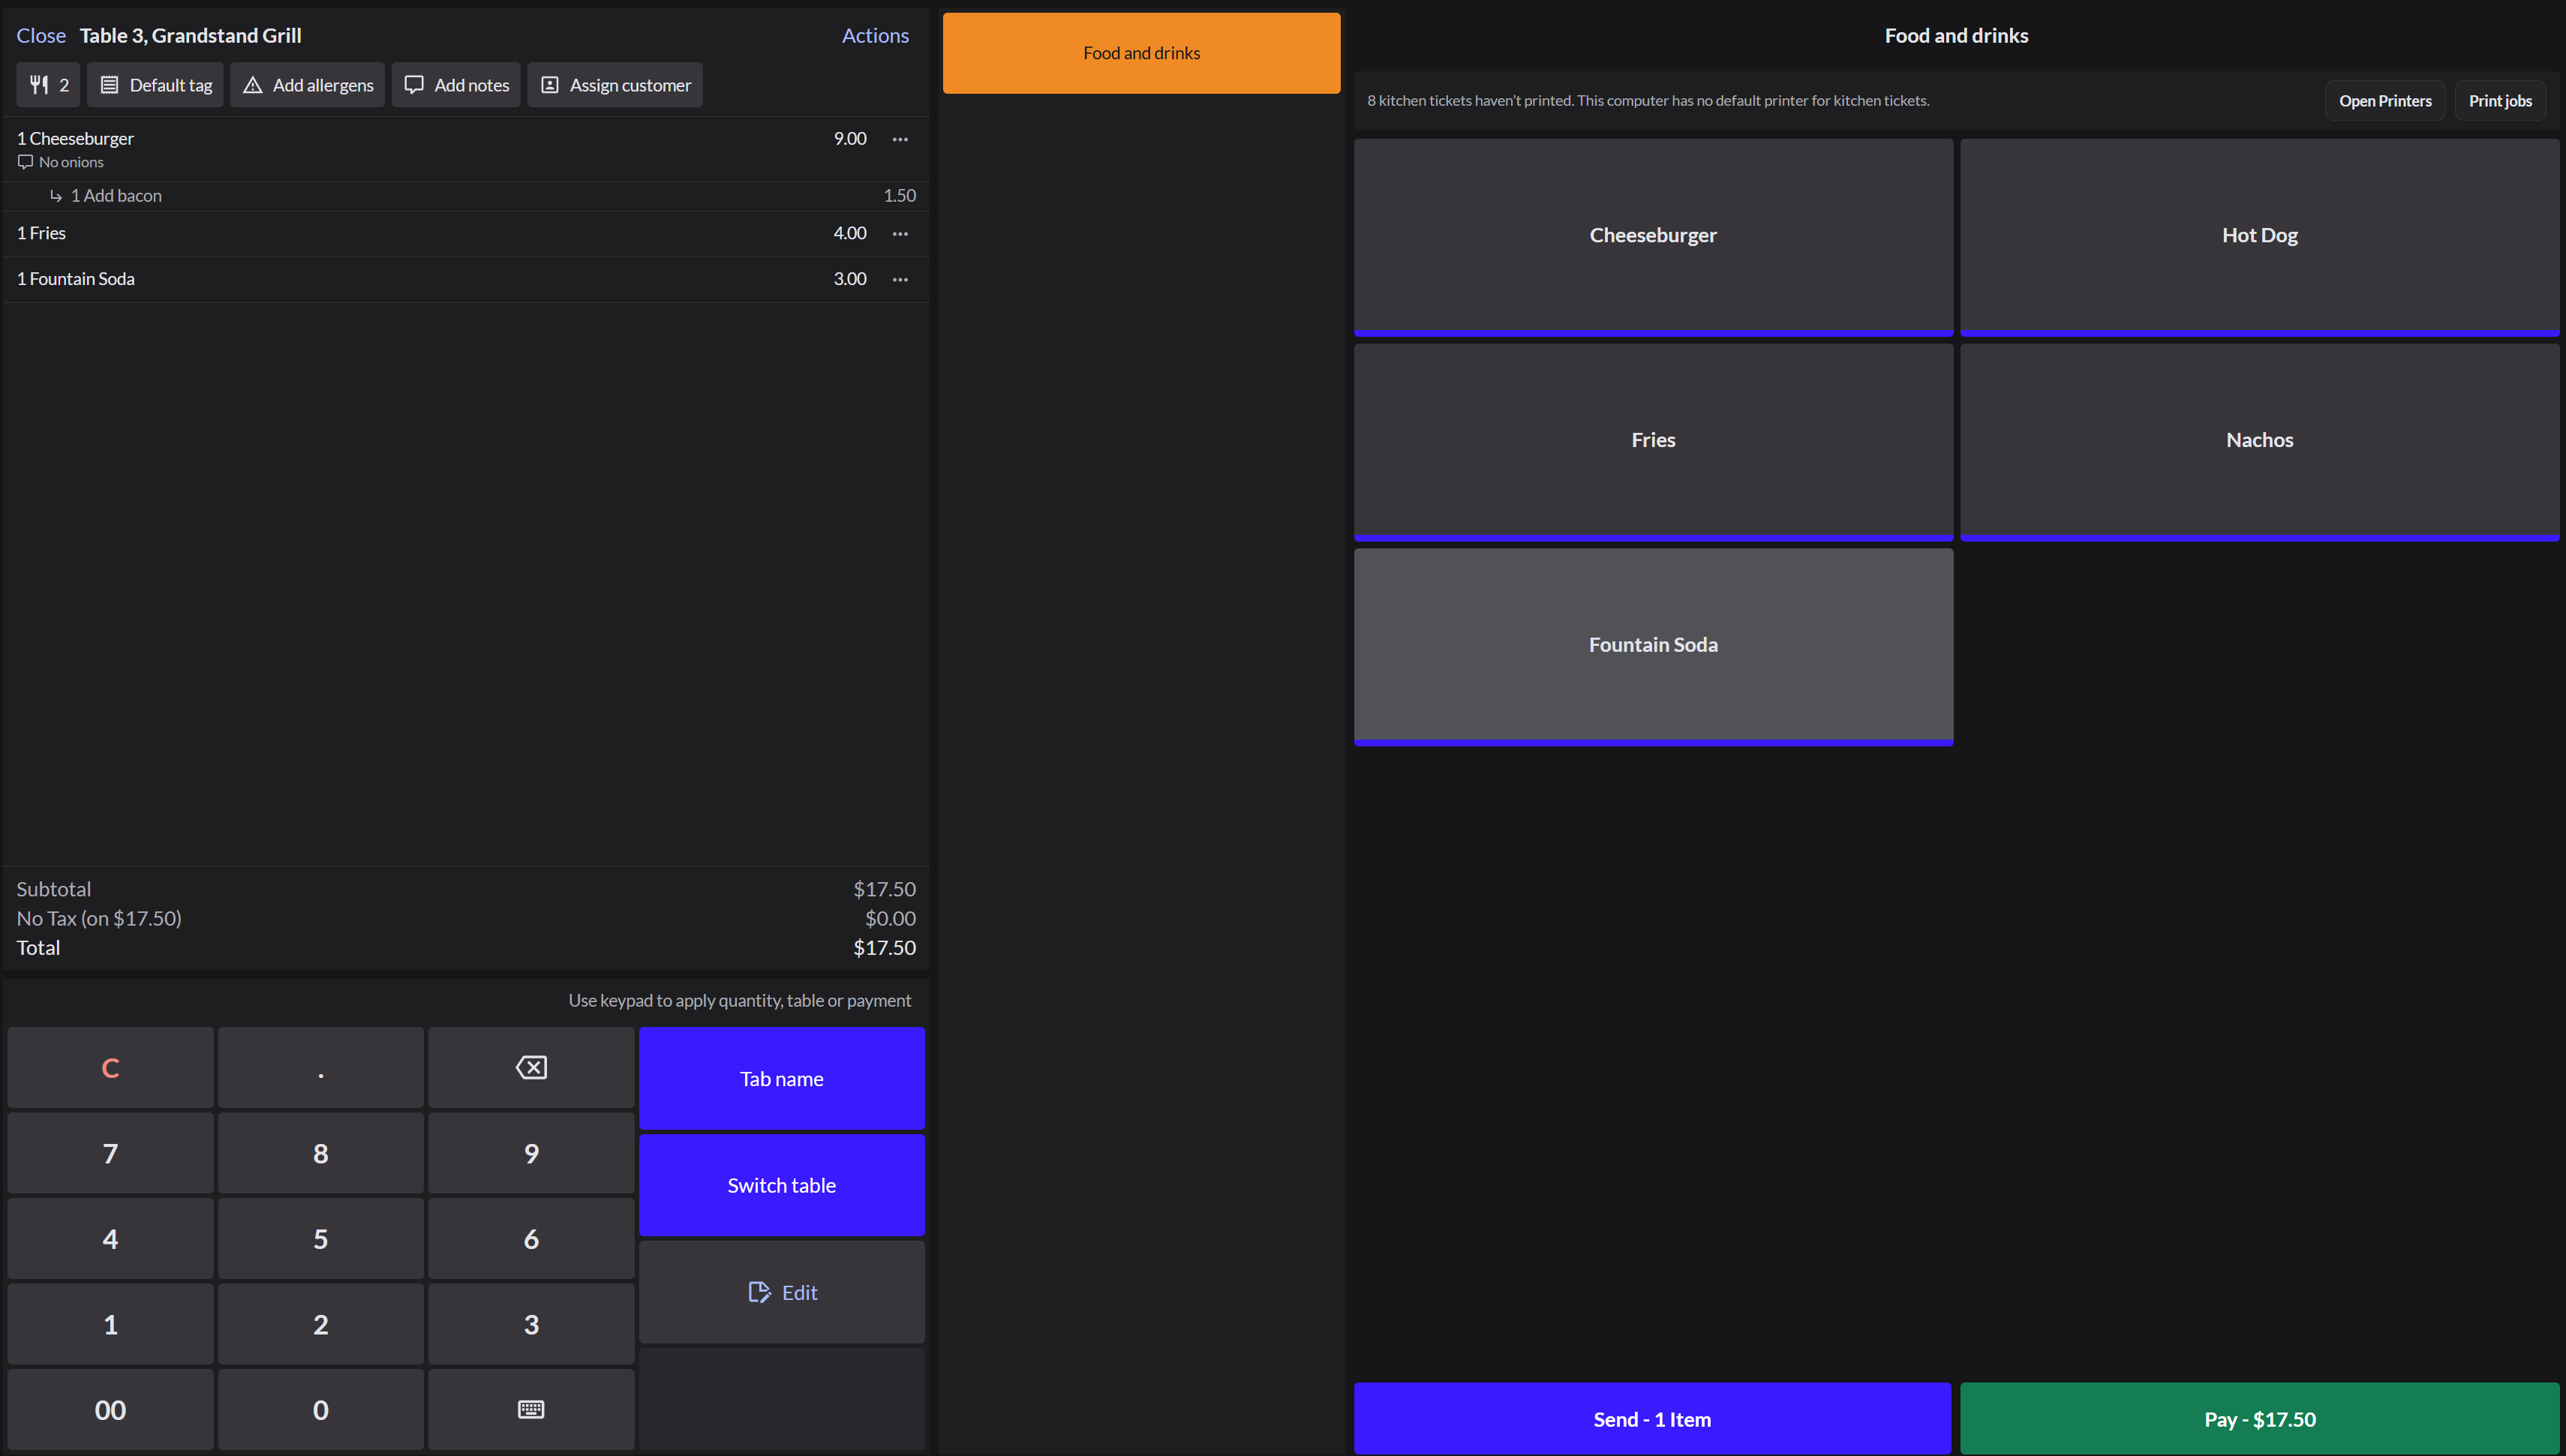
The order appears on the left, with extras indented under their item.
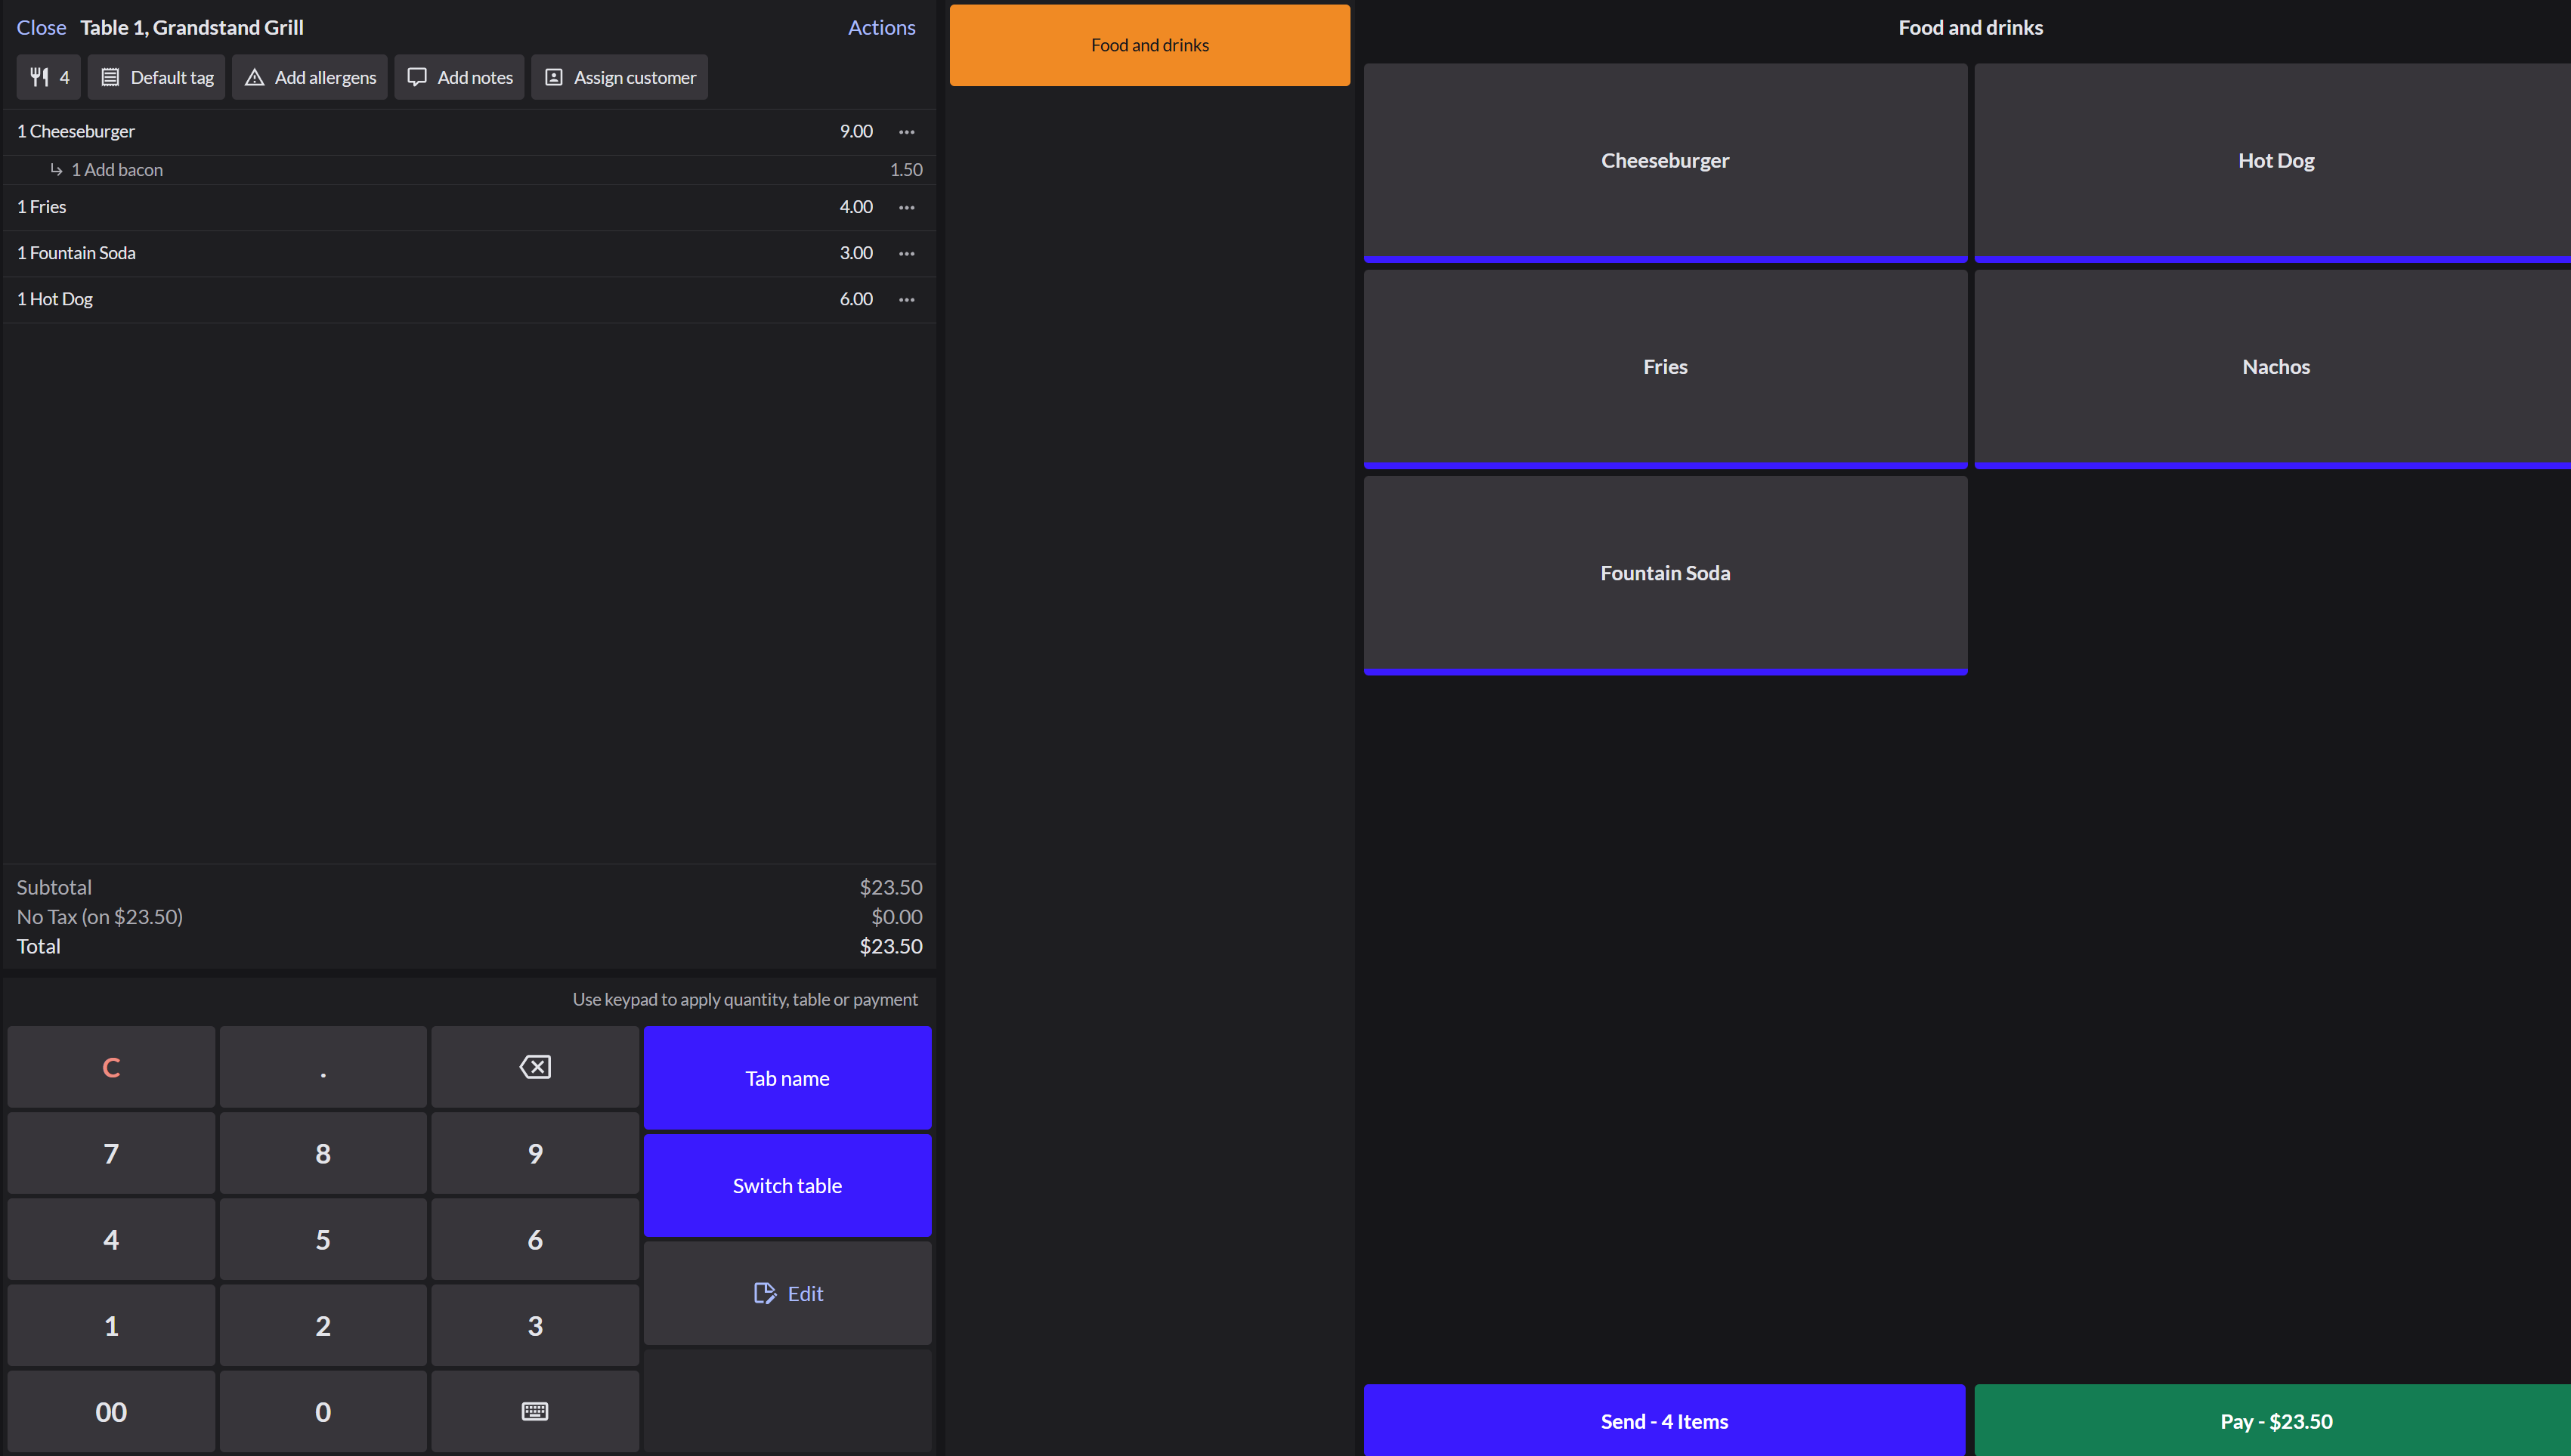
To add a note or allergen to one item, such as No onions, click … next to the item, then Add next to Notes or Allergens. More about changing an order
5. Send it
Click Send. The items go to the kitchen and the order is saved on the table. The screen clears for the next order.

Always click Send. If you leave the order without sending, the items stay saved on the table, but the kitchen never gets them. The Orders screen shows Not sent in the Kitchen column.
Add more to the table later
- Go to Sell › Tables and tap the table.
- Click Select.
- Tap the new items. The Send button counts only the new items, such as Send - 1 Item.
- Click Send.
To check which tables the kitchen has, click Status at the top of the Tables screen. Each table shows whether its order was sent.

Notes
- Add notes and Add allergens at the top go to the kitchen with the whole order.
- Tab name names a bar tab instead of a table.
- Use the keypad to set a quantity before tapping an item.
- To start a second order on a table that's in use, tap the table and click Start a new order.
If it doesn't work
- "This register is closed": the register has to be open before you take orders. Ask a manager. How to open the register
- "No menu yet": no menu is linked to this register. Ask an Admin. How to build a menu
- "Kitchen ticket hasn't printed": this computer has no kitchen printer. The order is still saved on the table. Click Open Printers to set one up. How to print kitchen tickets
